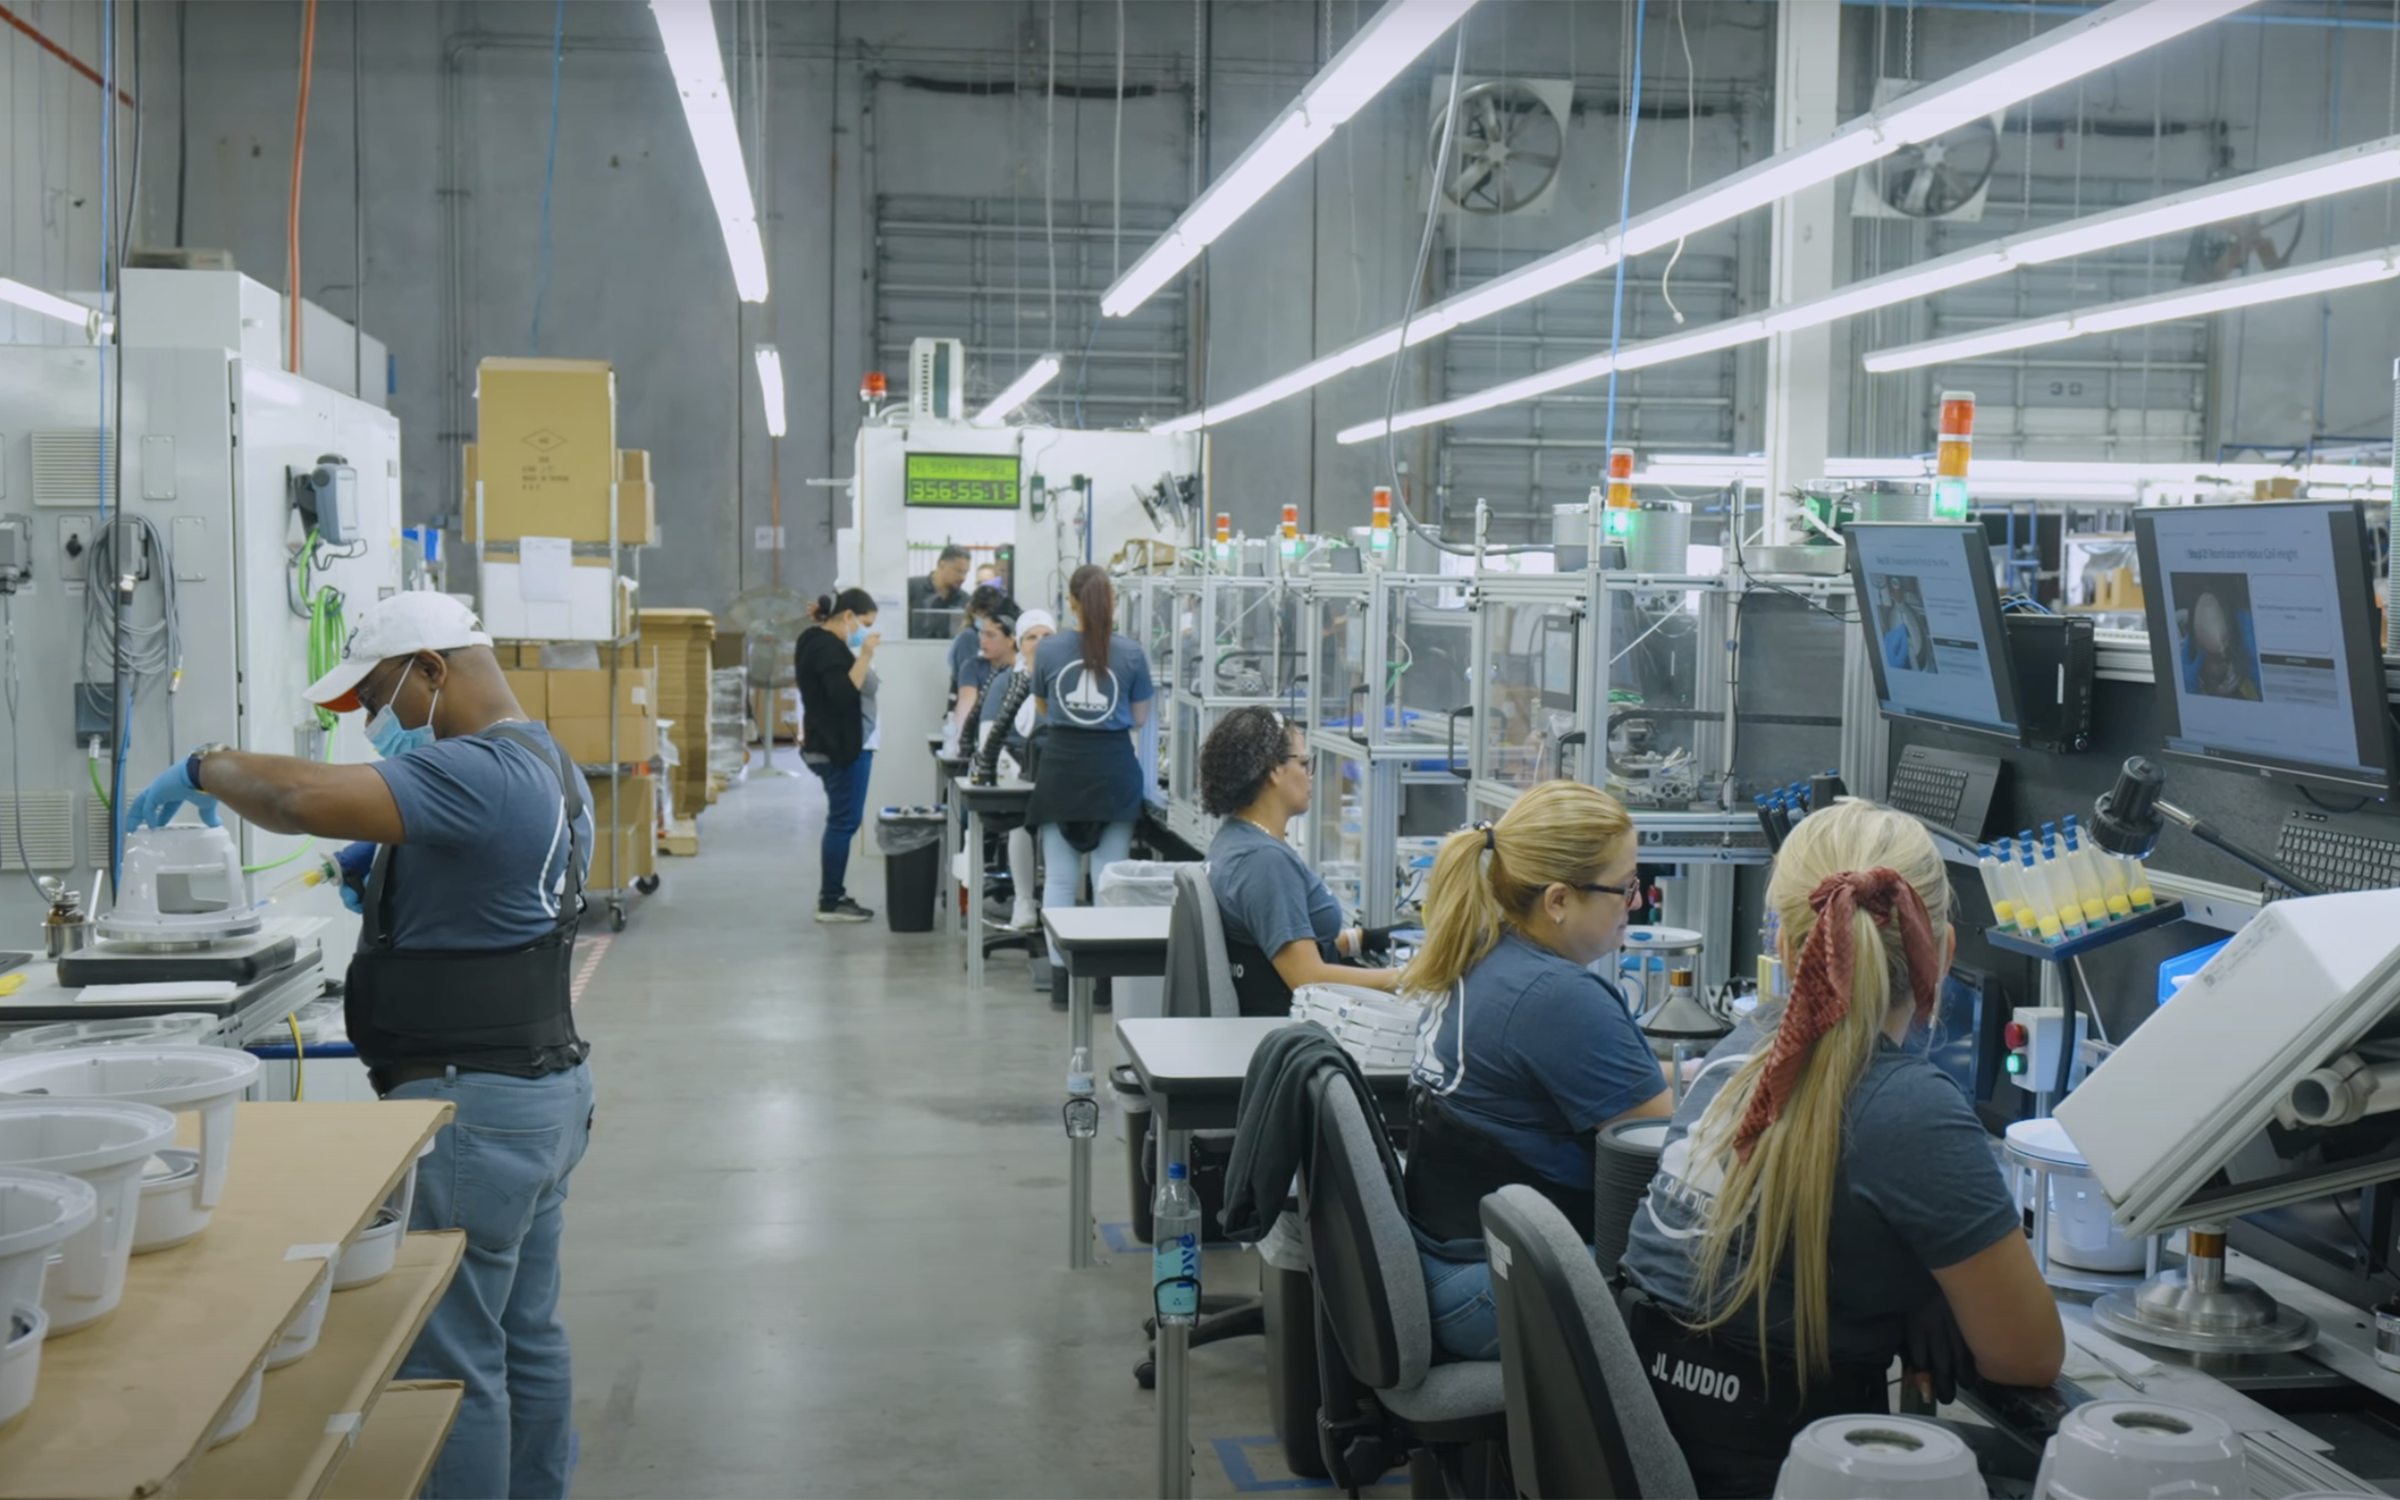
In this episode we are on the road visiting JL Audio at their home manufacturing plant in Miramar, Florida. Join us as we take you inside and show you how JL builds their world class speakers used in every Sportsman Boat...


-
•The manufacturing line blends in house engineering with precise station guidance and automation to deliver consistent high quality speakers
-
•Tuning uses multiple measurements and a master settings file to optimize sound for each boat zone
-
•Final QC and serial logging ensure traceable quality while workplace safety with ventilation is prioritized at every station
Welcome back to Behind the Glass; this week, we hit the road and made our way down to the JL Audio manufacturing facility in Miramar, Florida. JL Audio has been in business for over 40 years, and during that time, they have earned the spot as the best-selling marine audio equipment manufacturer.
JL Audio's product offering encompasses not just marine but also home, car, recreational vehicles, and power sports. Come along as we tour their 160 thousand square foot manufacturing facility divided into several production areas. These include a highly automated wood shop, fiberglass fabrication shop, machine shop, paint shop, loudspeaker assembly lines, and enclosed subwoofer assembly work sales. Today we will focus on the M6 marine speaker manufacturing line and give you an inside look at how they are built and tested.
The process begins with the motor. The motor is a ferromagnetic alloy that interacts with the voice coil and creates movement using a magnetic field. This is what drives the speaker's movement, which is translated to the pressure waves that we perceive as sound. The uncharged motor is placed inside the basket of the speaker. The basket is the structure of the speaker and houses all the components inside, hence the name. The basket and motor are placed inside a machine to magnetize the motor. This process only takes a few seconds, but the magnetization lasts for the speaker's lifetime. The basket is now ready to receive a mounting gasket before being flipped over to receive all of the components that make up the speaker. One thing we noticed during the tour is that above every station is a screen showing the instructions for each process on the line, ensuring each team member follows precise build guidelines set by JL Audio's in-house engineering team. After a quick QC check, the first of many along the line, a special bonding glue is added, and the gasket is properly aligned and permanently bonded.
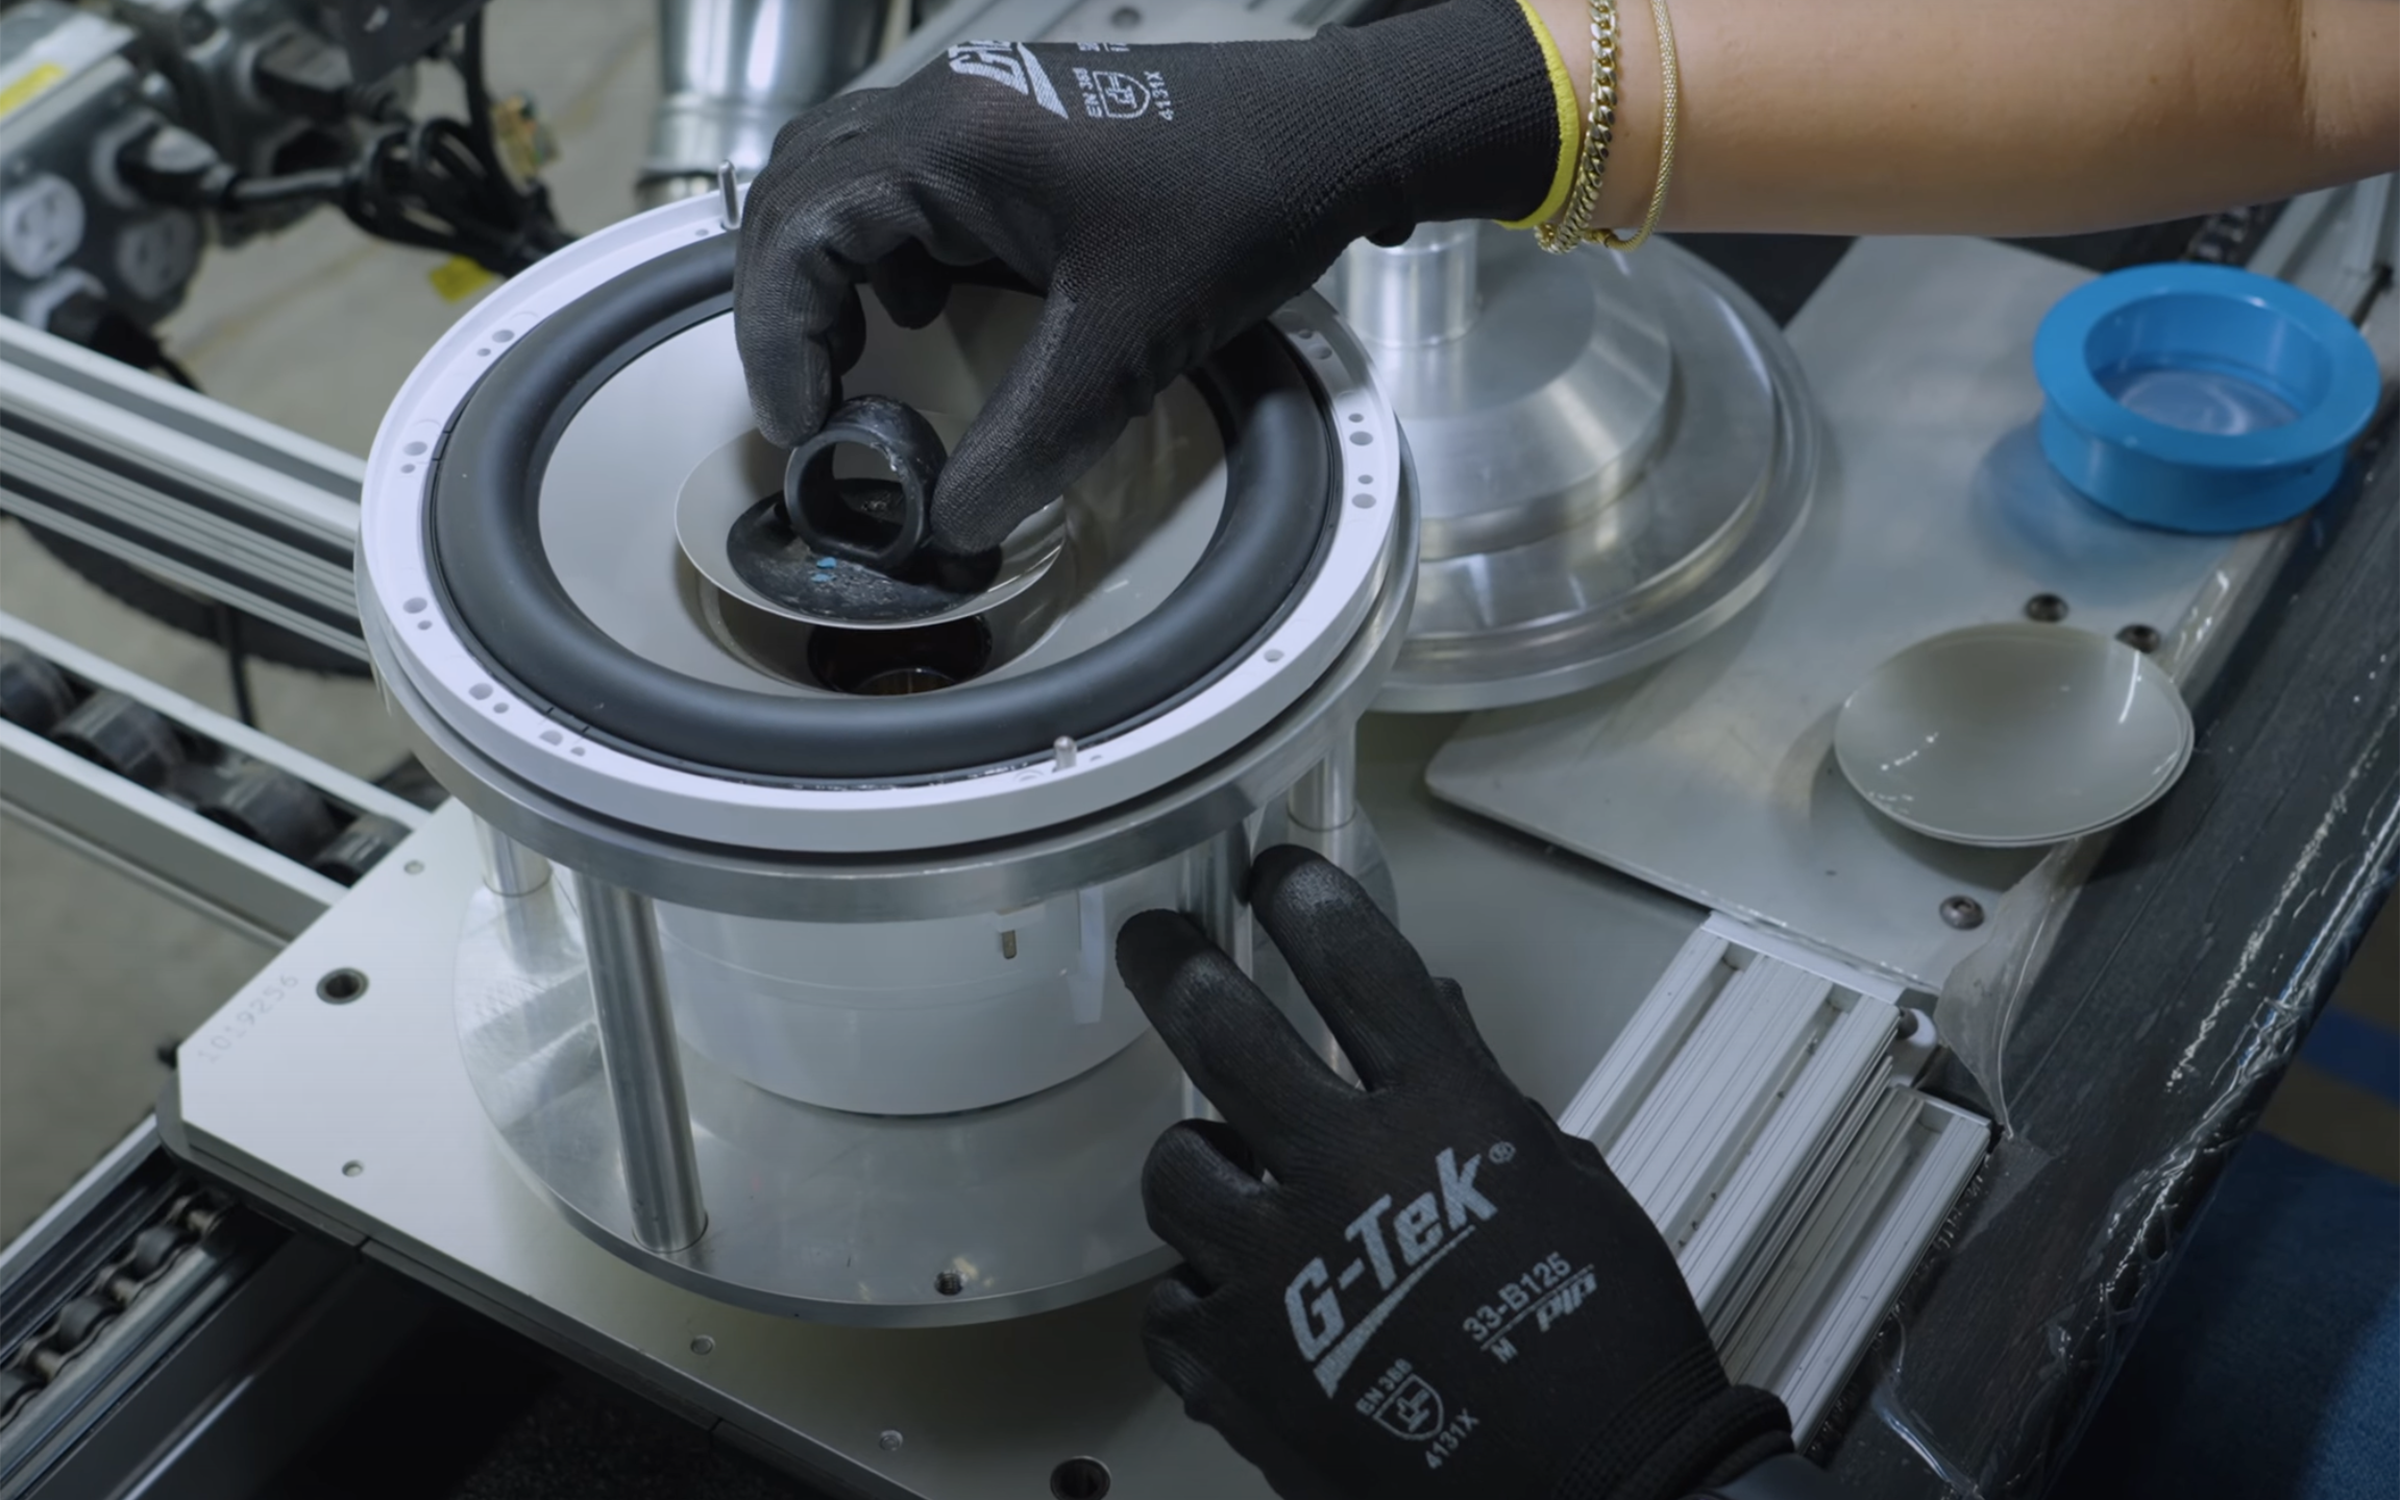
From here on out, this speaker is placed onto a jig on a conveyor belt, which will stay until it's removed for packaging. This will help with the proper fitment of all components and easy transportation from the station to station. Adjacent to the previously assembled basket, work begins on the speaker's cone. The cone is the visible part of the speaker where movement is translated into waves that produce sound. Before this production line, the cone had a sub-assembly where a rubber ring called the surround was bonded. This allows the cone to be attached to the basket later in the process. The cone is placed on a fixture, followed by a voice coil. The voice coil is comprised of a copper wire wound up around a cylinder called the former. The coil is then glued to the cone, and two flexible wires called lead wires are soldered to the coil. The flexible wires will later allow for movement while the speaker is playing without breaking. A flexible adhesive fills and encapsulates the solder connections of the lead wires from the elements. Another observation we had was each station is equipped with a vent in the back that removes any fumes ensuring good air quality for the safety and comfort of the team members.
The two assemblies travel down the line and into a chamber where computer-programmed automation occurs. During this phase, an applicator is programmed to apply a specific amount of primer to the cone, while at the same time, a robotic arm with a syringe applies a precise amount of glue to the basket. At the next station, the pre-assembled crossover ring is placed into the basket where the glue was previously applied. The crossover components supply the tweeter and mid-range signal range it was designed to reproduce best. Even though the crossover ring will eventually be hidden within the speaker, the components and connections are sealed to protect them from the elements and stabilize them even in the roughest conditions. Once in place, a weight is added to align and hold while the glue sets. Next, a team member will install the spider on the cone assembly. The spider acts as the suspension for the speaker. It allows for free movement of the voice coil but only in the vertical direction while centering the entire assembly in the horizontal direction. Using an alignment jig, the spider will be placed around the voice coil. Once in place, a layer of glue goes around the edge to ensure it's adhered to the voice coil.
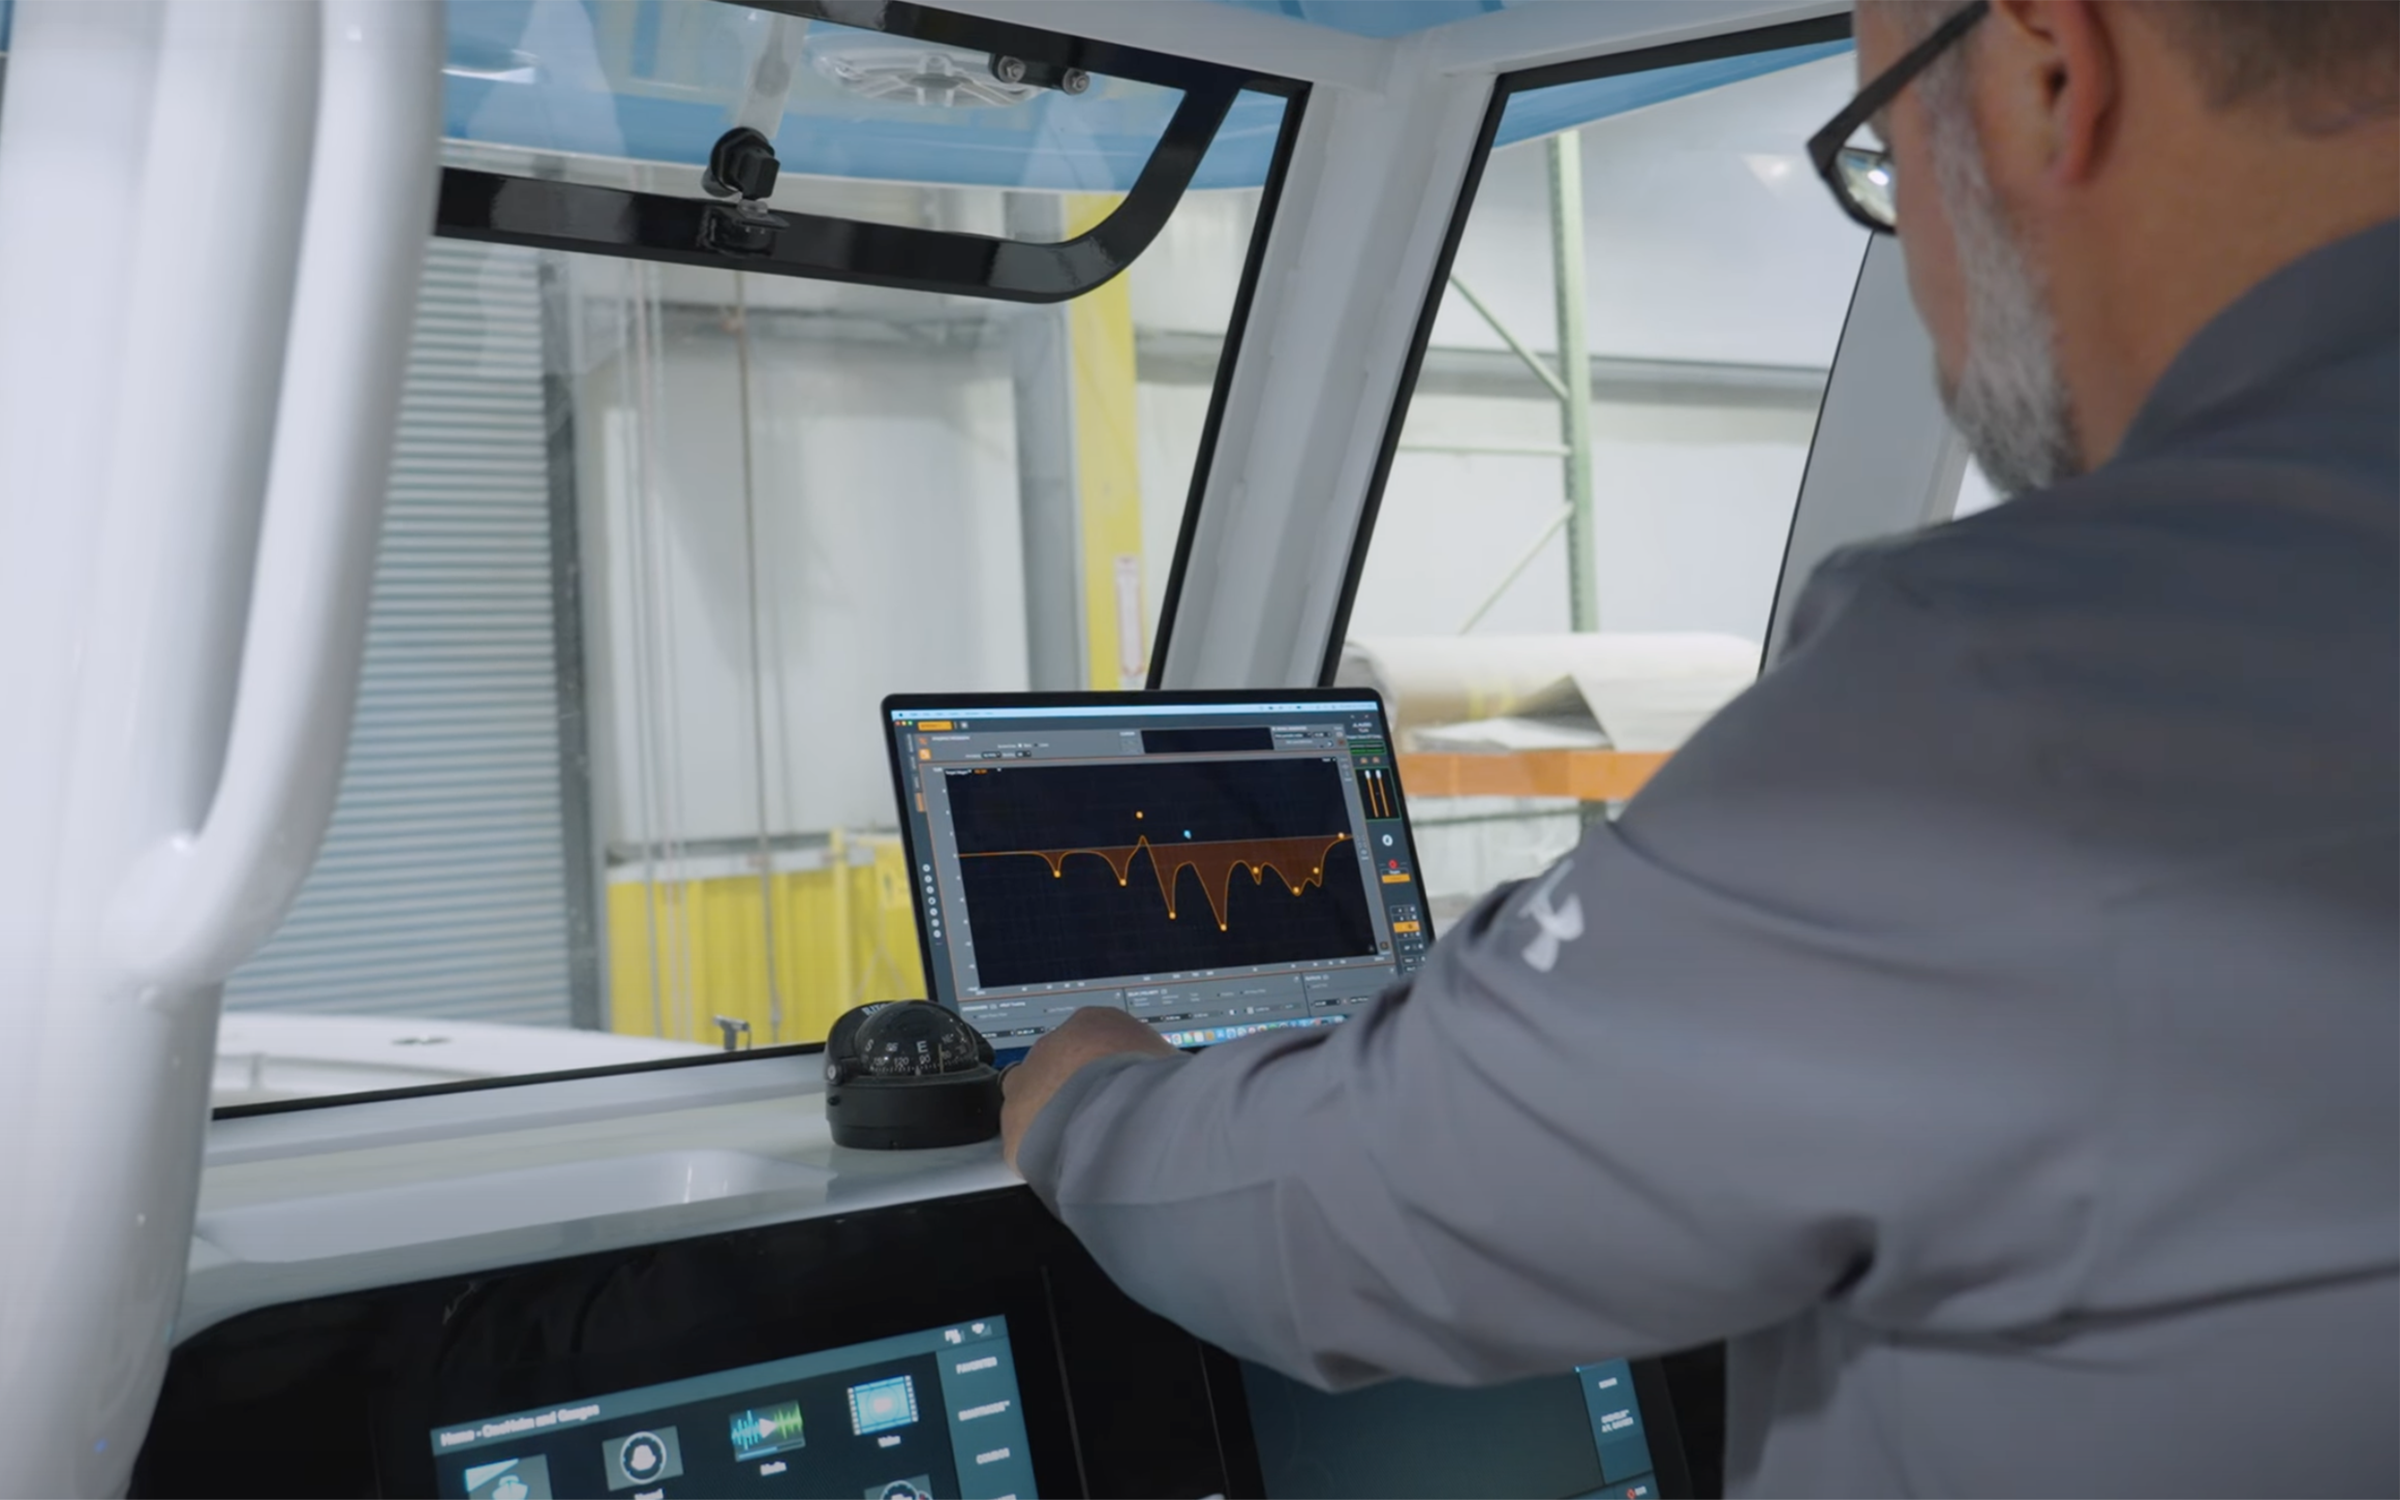
Our speaker assembly is almost complete, but we wanted to take a moment to look at the process of tuning our JL Audio ultra premium upgrade. With us today is Mr. Adam Iskit, and he is our account manager as well as an audio systems designer. The tuning process consists of strategically placing multiple microphones in the zone being tuned. A test signal is sent to those speakers and fed into JL Audio's proprietary software. Adam will analyze and make adjustments to multiple parameters according to the geometry of that zone. The process is repeated in each zone of the boat; typically, three zones are the bow helm and cockpit. This gives you the absolute best-sounding system on the water. Once Adam feels like the boat's sound system meets expectations, he will save a master settings file for this boat. We'll use that file to flash every similar model that comes down the line with the JL Audio ultra premium upgrade. Let's go ahead and jump back into the action as we see the rest of the assembly process of a speaker. The assemblies move on to another chamber area, where an accelerant is applied to cure the glue quickly. This ensures that everything is bonded and ready for the next step. When the parts exit the chamber, they are met by another team member who will remove the weights added to the crossover ring and apply a flexible sealant.
The assemblies progress into the chamber, where another automated glue application is applied around the perimeter of the crossover ring where the spider will connect. It will also apply glue around the top rim of the basket where the surround will sit, joining the two parts into one. Once the assemblies come out of the chamber, the team member will join the two parts.
The cone assembly, now dressed with a voice coil, spider and lead wires are placed down into the basket for final adhesion. Once fitted inside, a weight is placed on top to secure the two parts, and it's sent into another chamber for another application of the accelerator. The accelerator ensures that everything is firmly adhered to before the lead wires are routed and final connections are made. Next, the speaker is removed from the jig that has been moving along and placed onto a fixture where the lead wires will be soldered to the terminals and sealed with a flexible adhesive. Next, the assembled speaker is placed back onto the jig on the conveyor and makes its way into a final chamber, where an adhesive is applied for the installation of the dust cap. As the assembly exits the booth, a dust cap is placed at the center of the cone.
The dust cap plays an essential role in doing exactly as it sounds. It keeps dust, water, and debris out of the internal areas of the speaker. Next, labels are placed over the terminals. The serial number is placed inside the speaker, and a motor cover is installed on the bottom, sealing the motor assembly. An additional sticker is applied to the back of the basket with the speaker's model information. Next, the speaker receives the iconic JL Audio speaker grill cover. Once complete, it makes its way to final QC and testing. Prior to heading to packaging. Each speaker undergoes a battery of inspections and tests. This ensures the absolute highest quality product that JL Audio is known for. It begins with logging the serial number into the system, capturing all the manufacturing data, and assigning the test results for each speaker.
The first step is the same as the last, a visual inspection of the speaker for cosmetic flaws and validation of proper assembly techniques. The speaker is then hooked up to a test fixture where an array of functional tests are performed, a proper polarity, and a sweep of audible tones is played where the response is charted and compared to the target resulting in a pass or fail to proceed. It's incredible to see the combination of computer-controlled machines with the human touch working side by side to deliver an extremely high-quality product. As you're walking through the endless rows of this impressive manufacturing facility, you can't help but notice the internal culture JL Audio has built as a team.
A huge thank you to the entire JL Audio team for their help on this episode. Join us in our next installment of Behind the Glass, where we take a look at what it takes to manufacture fiberglass parts using two molds, a process called light RTM. Remember to subscribe for the latest content from Sportsman Boats.
Related Posts

Oysters are essential to Charleston’s coastal ecosystem and economy. Learn how responsible harvesting supports reef health, boosts conservat...
Read More